


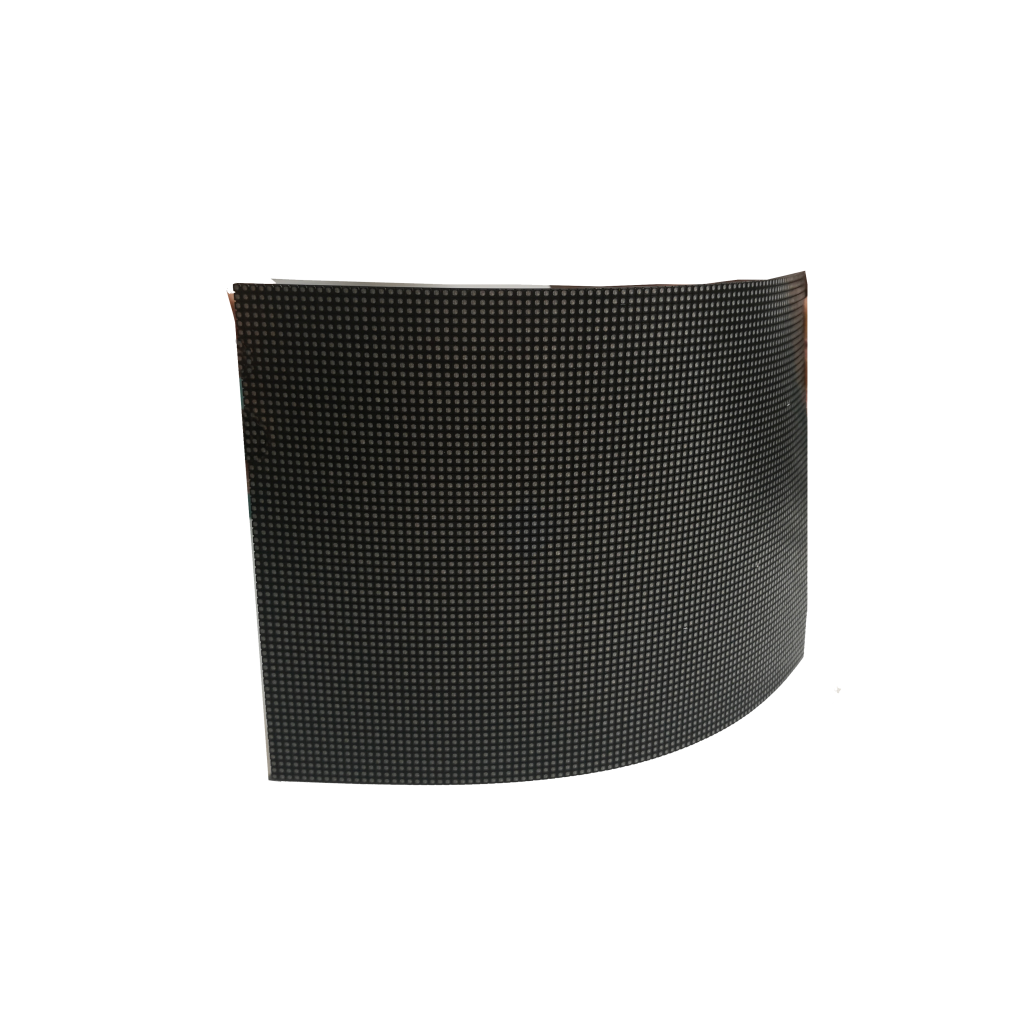


When choosing an LED film screen for glass integration, consider these 5 key factors: transparency (70%-95% for natural light), pixel pitch (3mm-10mm for clarity), flexibility (ultra-thin <2mm films), energy efficiency (30%-50% lower power than traditional LEDs), and easy installation (adhesive or magnetic options). Ensure compatibility with glass thickness (6mm-12mm) and environmental durability (IP54+ for outdoor use). Balance visibility and aesthetics for seamless integration.
Transparency and Light: Balancing Visibility and Natural Illumination
Most high-quality LED films offer 70% to 95% transparency, meaning they let through most daylight while still delivering bright visuals. For example, a 10mm pixel pitch film typically achieves 85% transparency, whereas a finer 3mm pitch might drop to 75% due to denser LED clusters.
A 5000-nit screen ensures visibility in direct sunlight but may require 30% more power than a standard 3000-nit display. If the glass faces north or is indoors, 2000-3000 nits is sufficient, cutting energy costs by 15-20%. Some films use micro-louver technology to reduce glare without sacrificing transparency, improving readability at 60-degree viewing angles.
Light transmission tests show that 6mm-thick tempered glass with an LED film loses 10-15% less brightness compared to 12mm laminated glass, which absorbs more light. For retail storefronts, 80% transparency is ideal—bright enough for ads but still allowing shoppers to see inside. In offices, 90%+ transparency works better to maintain an open feel.
Key Factors Affecting Transparency
- Pixel density: Higher density = lower transparency (e.g., 3mm pitch = 75%, 10mm = 85%).
- Glass type: Tempered glass outperforms laminated in light transmission.
- Brightness needs: 5000 nits for outdoor, 2000-3000 nits for indoor.
- Power trade-offs: Higher brightness increases energy use by 20-30%.
Pixel Clarity Matters: Why Resolution and Viewing Distance Define Success
A 3mm pitch means crisp visuals even at 3 feet (1 meter), while a 10mm pitch works for 10+ feet (3+ meters) viewing. But here’s the catch: smaller pitch = higher cost. A 3mm LED film can cost 40-60% more than a 6mm version, so choosing the right balance is critical.
For indoor applications like retail displays or corporate lobbies, where people stand 3-6 feet away, a 4-6mm pitch hits the sweet spot—clear enough without overspending. A 6mm film typically runs 180 per square meter, while a 4mm version jumps to 260. Outdoor billboards, where viewers are 15+ feet away, can get away with 8-10mm pitch, slashing costs by 30-50% compared to fine-pitch options.
Viewing angle also plays a role. Most LED films maintain 160-178° visibility, but pixel density affects how sharp the image stays at an angle. A 5mm pitch screen might start looking grainy beyond 45 degrees, while a 3mm pitch stays sharp up to 60 degrees. If your installation has wide walkways (like airports or malls), spending extra on a tighter pitch ensures readability from all angles.
Pixel Pitch vs. Optimal Viewing Distance
| Pixel Pitch (mm) | Best Viewing Distance | Typical Use Case | Cost per m² (USD) |
|---|---|---|---|
| 3.0 | 3 ft (1 m) | Luxury retail, close-up displays | 350 |
| 4.0 | 4-6 ft (1.2-1.8 m) | Corporate lobbies, museums | 260 |
| 6.0 | 6-10 ft (1.8-3 m) | Indoor signage, restaurants | 180 |
| 8.0 | 10-15 ft (3-4.5 m) | Outdoor kiosks, transit ads | 140 |
| 10.0 | 15+ ft (4.5+ m) | Billboards, stadiums | 110 |
A 3840Hz refresh rate eliminates flicker under cameras, crucial for live broadcasts or social media content. Cheaper films with 960Hz or lower may cause striping effects when filmed at 30fps or higher. For high-traffic areas where smartphones are constantly recording, investing in a high-refresh model prevents embarrassing visual glitches.
A 4mm pitch screen displaying 4K content looks stunning, but if your source is 1080p or lower, the image may appear soft. Always match your media resolution to the screen’s pixel density—otherwise, you’re wasting money on clarity you won’t see.
Thin and Flexible Design: When Every Millimeter Counts
Modern LED films range from 0.8mm to 2.5mm thick, with the thinnest models weighing just 800 grams per square meter. This ultra-slim profile allows installation on curved glass with 5-15cm radius bends, perfect for cylindrical store displays or architectural features.
Flexibility comes at a price point premium – a 1.2mm flexible film costs about 25-35% more than a standard 2.0mm rigid version. However, the installation savings often justify the extra cost. Where a traditional LED display might require 8-12 hours of professional installation, a flexible film can be applied by two technicians in under 4 hours, cutting labor costs by 40-60%. The thinnest 0.8mm films are so lightweight they can adhere to glass as thin as 3mm without requiring additional structural support.
Durability testing shows these thin films can withstand 50,000+ bend cycles before showing signs of pixel failure. The 1.5mm thickness has emerged as the industry sweet spot, offering enough rigidity for 10-year lifespan projections while maintaining enough flexibility for 30-degree compound curves. For outdoor applications, the slightly thicker 2.0-2.5mm versions provide better protection against hail impacts up to 25mm diameter at 90km/h velocities.
The 1.2mm films maintain optimal operating temperatures between -30°C to 60°C, while thicker 2.0mm+ versions can handle -40°C to 70°C ranges. In direct sunlight applications, the additional mass of thicker films helps dissipate heat, reducing brightness degradation to just 5% per 10,000 hours compared to 8-10% for ultra-thin versions.
Installation methods also differ by thickness:
- Adhesive-backed films (0.8-1.5mm): Peel-and-stick application, 30-minute setup per m²
- Magnetic systems (1.5-2.5mm): Reusable mounting, 15-minute setup per m²
- Frame-mounted (2.0mm+): Most secure option, 45-60 minute setup per m²
For temporary installations or frequently updated displays, the 1.2mm adhesive films offer the best balance. Permanent architectural integrations typically benefit from the 1.8-2.2mm semi-rigid options that can handle decades of thermal cycling without delamination.

Power Efficiency Tips: Cutting Costs Without Sacrificing Brightness
LED film screens consume 30-50% less power than traditional LED displays, but there’s still room for optimization. A typical 1m² LED film running at 5000 nits brightness draws about 180-220 watts, while the same area at 3000 nits uses just 120-150 watts – that’s 35% power savings for only a 15% reduction in perceived brightness. The latest PWM (Pulse Width Modulation) drivers can reduce energy consumption by another 12-18% through smarter power distribution, especially in partial display activation scenarios where only sections of the screen are lit.
Systems with ambient light sensors can dynamically scale from 1000 nits (indoor/low light) to 5000 nits (direct sunlight) while maintaining 40-60% power reduction compared to fixed-brightness setups. For a 10m² display operating 14 hours daily, this translates to 1200 annual savings in electricity costs at $0.15/kWh. The ROI on light sensors typically pays back in 8-14 months, making them essential for permanent installations.
Running 48V systems instead of standard 24V configurations improves efficiency by 6-9% due to reduced current requirements and lower resistive losses in the circuitry. High-efficiency Class D power supplies can push this to 12-15% savings, though they add 5-8% to initial hardware costs. For large-scale projects exceeding 50m², these technical choices can mean $3000+ yearly savings in operational expenses.
Here’s how different brightness levels affect power consumption in a 1m² LED film:
| Brightness (nits) | Power Consumption (watts) | Daily Cost (14h @ $0.15/kWh) | Annual Cost |
|---|---|---|---|
| 1000 | 60-80W | 0.17 | 62 |
| 3000 | 120-150W | 0.32 | 117 |
| 5000 | 180-220W | 0.46 | 168 |
| 7000 | 250-300W | 0.63 | 230 |
Every 10°C reduction in operating temperature improves LED lifespan by 15-20% and maintains 5-7% better power efficiency. Active cooling systems aren’t usually necessary – simple 2-3cm ventilation gaps behind the film and aluminum heat-dissipating backings can keep temperatures 12-18°C lower than sealed installations. In extreme climates, thermally conductive adhesives can further improve heat transfer, preventing the 3-5% brightness drop that typically occurs when displays exceed 50°C.
Static images with 30% black pixels use 18-22% less power than full-motion video. Scheduling 30-second dimming cycles during low-traffic periods (like 2-5AM) can cut overnight power use by 40-50% without affecting daytime visibility. Some advanced controllers even offer per-pixel power management, dynamically adjusting current flow to darker areas of the screen for additional 8-12% savings.
In runs longer than 15 meters, standard installations experience 10-15% brightness variation between closest and farthest sections due to line losses. Active voltage regulation modules (priced at 80 per 5m segment) eliminate this by maintaining consistent ±2% voltage across the entire display, ensuring uniform brightness while preventing overdriving of closer sections that wastes 5-8% excess power. For long linear installations (like airport walkways), this technology pays for itself in 6-9 months through energy savings alone.
Easy Installation Steps: Getting It Right the First Time
Installing LED film screens doesn’t have to be complicated, but skipping key steps can lead to 30-50% longer installation times and potential performance issues. The average 10m² installation takes 2-3 hours for experienced teams using proper techniques, compared to 4-6 hours for first-time installers. Preparation is everything – having the right tools (laser level, squeegee, and infrared thermometer) can cut installation time by 25-35% while improving alignment accuracy to within ±1mm tolerance.
Glass surfaces must be cleaned with isopropyl alcohol (70% concentration) and maintained at 18-25°C for optimal adhesive performance. Skipping this step reduces initial adhesion by 40-60% and may cause bubbling within 6-12 months. For outdoor installations, applying primer solution increases bond strength by 30% and extends service life by 2-3 years in UV-exposed locations. The entire cleaning process takes just 15 minutes per 10m², but saves hours of potential rework later.
Peel-and-stick installations work best when following the 30-degree angle technique – removing the backing paper at a shallow angle while applying firm pressure with a 10cm rubber squeegee. This method reduces air bubble formation by 75% compared to quick peel methods. For larger installations (over 15m²), the wet application approach using soapy water solution allows 5-10 minutes of repositioning time, crucial for achieving perfect alignment across multiple panels. The water evaporates completely within 24 hours, leaving full adhesive strength.
Here’s how different installation methods compare in real-world conditions:
- Dry adhesive (peel-and-stick): Fastest method (1.5h per 10m²), but allows only 1-2mm adjustment range during application
- Wet application: Slower initial setup (2.5h per 10m²), but permits 5-8mm adjustments during installation
- Magnetic mounting: Quickest option (45min per 10m²), though requires pre-installed ferrous surfaces adding 15% to material costs
- Frame systems: Most labor-intensive (4h per 10m²), but provides easiest maintenance access later
Using pre-terminated cables saves 20-30 minutes per connection point compared to field-terminated wires. The maximum recommended run between power supplies is 8 meters for 24V systems and 15 meters for 48V installations – exceeding these distances causes 10-15% voltage drop and visible brightness variation. Daisy-chaining more than 6 panels without power injection leads to 20-30% brightness loss at the end of the line, easily avoided by planning power distribution points every 4-5 panels.
Post-installation calibration takes just 30 minutes but improves overall display quality by 40%. This includes:
- Color uniformity adjustment (eliminating 5-10% variance between panels)
- Brightness matching (reducing 15-20% hotspot variations)
- Viewing angle optimization (compensating for 10-15° installation tilt if present)
For curved installations, the maximum recommended bend radius is 15cm for 1.2mm films and 25cm for 2.0mm versions. Exceeding these limits causes microfractures that reduce lifespan by 30-50%. Temporary heat gun application (60-80°C) allows tighter 8-10cm bends, but should only be performed by experienced installers as overheating beyond 90°C damages LED components permanently.
Leaving 10-15cm service gaps behind the display allows for 50% faster module replacements when needed. For ceiling-mounted installations, specifying hinged access panels at every 3m interval reduces service time from 2 hours to 30 minutes per repair. These upfront considerations add just 5% to installation time but save 40-60% on future maintenance labor costs.


![How to Choose a Flexible LED Display [Buyer's Guide]](https://www.szradiant.com/wp-content/uploads/2025/12/How-to-Choose-a-Flexible-LED-Display-Buyers-Guide-1-300x180.jpg)


